
What we will do:
- Update and Upgrade CentOS 7
- Checking the Kernel Version
- Add ELRepo Repository
- Install New Kernel Version
- Configure Grub2
Step 1 — Update and Upgrade CentOS 7 and install the plugin
#yum -y update
#yum -y install yum-plugin-fastestmirror
Step 2 — Checking the Kernel Version
#cat /etc/redhat-release
#cat /etc/os-release
#uname -snr
[root@docker02 ~]# cat /etc/redhat-release
CentOS Linux release 7.9.2009 (Core)
[root@docker02 ~]# cat /etc/os-release
NAME="CentOS Linux"
VERSION="7 (Core)"
ID="centos"
ID_LIKE="rhel fedora"
VERSION_ID="7"
PRETTY_NAME="CentOS Linux 7 (Core)"
ANSI_COLOR="0;31"
CPE_NAME="cpe:/o:centos:centos:7"
HOME_URL="https://www.centos.org/"
BUG_REPORT_URL="https://bugs.centos.org/"
CENTOS_MANTISBT_PROJECT=”CentOS-7″
CENTOS_MANTISBT_PROJECT_VERSION=”7″
REDHAT_SUPPORT_PRODUCT=”centos”
REDHAT_SUPPORT_PRODUCT_VERSION=”7″
[root@docker02 ~]# uname -snr
Linux docker02 3.10.0-693.21.1.el7.x86_64
Step 3 — Add ELRepo Repository
Before installing the new kernel version, we need to add a new repository — the ELRepo repository.
Add ELRepo gpg key to the system.
#rpm --import https://www.elrepo.org/RPM-GPG-KEY-elrepo.org

#rpm -Uvh https://www.elrepo.org/elrepo-release-7.0-3.el7.elrepo.noarch.rpm
When it’s complete, check all repository enabled on the system, and make sure ELRepo is on the list.
#yum repolist
Step 4 — Install New CentOS Kernel Version
In this step, we will install a new latest kernel from ELRepo repository, kernel version 5.0.11 — the Latest stable version on kernel.org.
Install the ELRepo kernel version with the yum command below.
yum --enablerepo=elrepo-kernel install kernel-ml
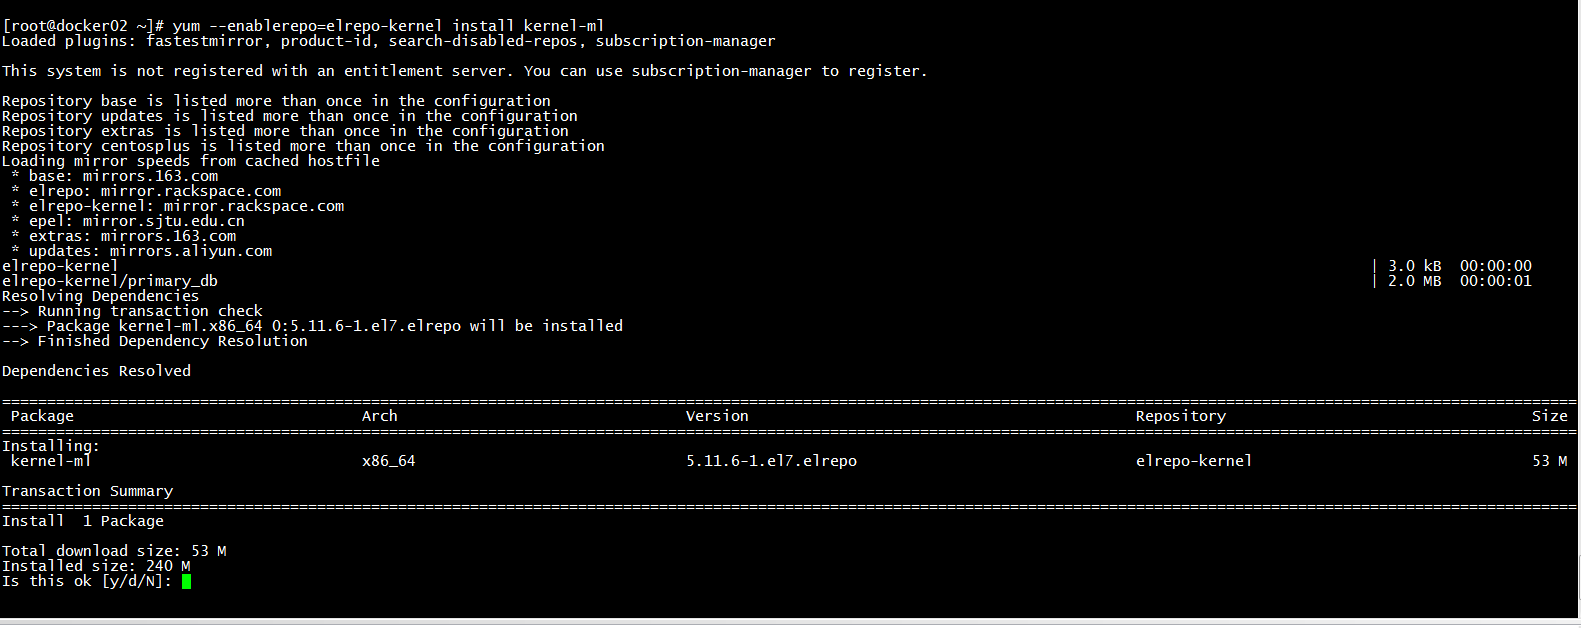
官方的更新日志:
https://cdn.kernel.org/pub/linux/kernel/v5.x/ChangeLog-5.11.6
Step 5 — Configure Grub2 on CentOS 7
At step 4, we’ve already installed a new kernel 5.11 to the system. Now, I will show you how to configure the default kernel version to load when the system is starting.
Check all available kernel versions in the Grub2 with awk command below.
awk -F\' '$1=="menuentry " {print i++ " : " $2}' /etc/grub2.cfg
[root@docker02 ~]# awk -F\' '$1=="menuentry " {print i++ " : " $2}' /etc/grub2.cfg

0 : CentOS Linux (5.11.6-1.el7.elrepo.x86_64) 7 (Core)

1 : CentOS Linux (3.10.0-1160.15.2.el7.x86_64) 7 (Core)

2 : CentOS Linux (3.10.0-693.21.1.el7.x86_64) 7 (Core)

3 : CentOS Linux (3.10.0-693.el7.x86_64) 7 (Core)

4 : CentOS Linux (0-rescue-288e768b6e32406a95478f858e403c8c) 7 (Core)
You see that we have two kernel versions — 3.10 and 5.11.
Now we want to configure the default kernel that will run when the system is starting. We will use kernel 5.0 as our default, so you can use the command below to set it up.
#sudo grub2-set-default 0
0 — it’s from the awk command on the top. Kernel 5.11 = 0, and Kernel 3.10 = 1. When you want to back to the old kernel, you can change the value of the grub2-set-default command to 1.
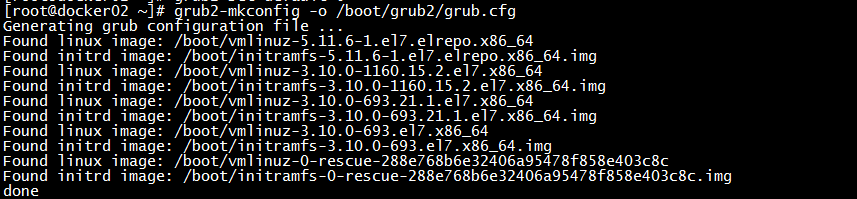
Next, generate the grub2 config with ‘gurb2-mkconfig’ command, then reboot the server.
#sudo grub2-mkconfig -o /boot/grub2/grub.cfg
#sudo reboot
Login to the server again, and check currently kernel version.
uname -snr
DONE….!!!
[root@docker02 ~]# uname -snr
Linux docker02 5.11.6-1.el7.elrepo.x86_64
参考:
https://medium.com/@nazishalam07/update-centos-kernel-3-10-to-5-13-latest-9462b4f1e62c