适用场景:
1)需要部署上百台甚至上千上万台的系统安装
2)没有光驱
1.pxe介绍
PXE(preboot execute environment,预启动执行环境)是由Intel公司开发的最新技术,工作于Client/Server的网络模式,支持工作站通过网络从远端服务器下载映像,并由此支持通过网络启动操作系统,在启动过程中,终端要求服务器分配IP地址,再用TFTP(trivial file transfer protocol)或MTFTP(multicast trivial file transfer protocol)协议下载一个启动软件包到本机内存中执行,由这个启动软件包完成终端基本软件设置,从而引导预先安装在服务器中的终端操作系统。PXE可以引导多种操作系统,如:Windows95/98/2000/windows2003/windows2008/winXP/win7/win8,linux等。
2.无人值守安装系统原理
简单得说,无人值守安装系统 就是,客户机通过支持pex的网卡向网络中发送dhcp信息广播,请求获取ip地址等信息,网络中的dhcp服务器收到请求验证通过后,给客户机返回ip地址和相关的信息(tftp服务器地址,启动文件),之后,客户机向网络中的ftp服务器请求下载操作系统安装需要的文件。在这个过程中需要一台服务器来提供启动文件,安装文件,以及安装过程中的自动应答文件等。下图中介绍了linux中自动安装系统的详细过程。
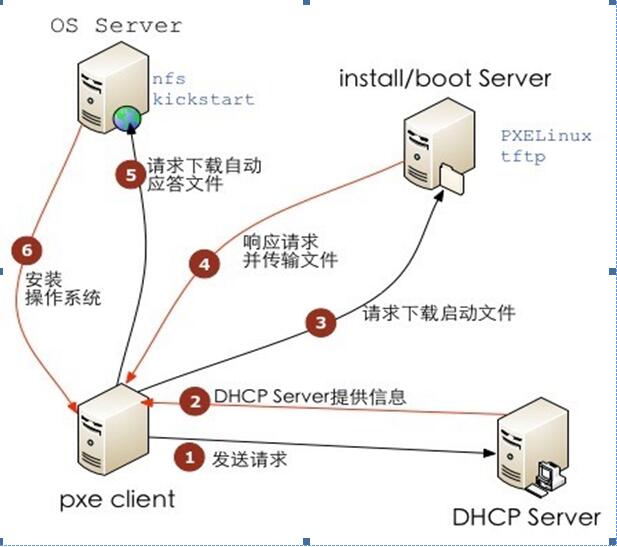
第一步:PXE Client向DHCP发送请求
首先,将支持PXE的网络接口卡(NIC)的客户端的BIOS设置成为网络启动,通过PXE BootROM(自启动芯片)会以UDP(简单用户数据报协议)发送一个广播请求,向网络中的DHCP服务器索取IP地址等信息。
第二步:DHCP服务器提供信息
DHCP服务器收到 客户端的请求,验证是否来至合法的PXE Client的请求,验证通过它将给客户端一个“提供”响应,这个“提供”响应 中包含了为客户端分配的IP地址、pxelinux启动程序(TFTP)位置,以及配置文件所在位置。
第三步:PXE客户端请求下载启动文件
客户端收到服务器的“回应”后,会回应一个帧,以请求传送启动所需文件。这些启动文件包括:pxelinux.0、pxelinux.cfg/default、vmlinuz、initrd.img等文件。
第四步:Boot Server响应客户端请求并传送文件
当服务器收到客户端的请求后,他们之间之后将有更多的信息在客户端与服务器之间作应答, 用以决定启 动参数。BootROM 由 TFTP 通讯协议从Boot Server下载启动安 装程序所必须的文件(pxelinux.0、pxelinux.cfg/default)。default文件下载完 成后,会根据该文件中定义的引导顺序,启动Linux安装程序的引导内核。
第五步:请求下载自动应答文件
第六步:安装操作系统
3无人值守安装配置操作过程
3.1配置pxe网络安装的说明及步骤顺序
a.配置nfs/http服务器,用于存放linux系统的安装文件
b.配置tftp服务器,用于提供客户端px引导所必须的启动文件
c.配置dhcp服务器,用于给客户端提供ip地址及其他信息
d.配置kickstart,用于自动应答安装
e.使用pxe功能引导客户机
提示,前4步都是在服务器端操作,可以放到不同的服务器上;也可以都配置到一台服务器上。
环境:
centos 6.3 x64
pxe+dhcp+nfs+kickstart?? 192.168.1.240
4.安装web服务,并将系统文件拷贝到站点目录下
yum install httpd –y
mount /dev/cdrom /mnt
cp -a /mnt/* /var/www/html/sys
5.安装配置tftp服务
1)安装tftp
yum install tftp-server* -y
2)配置tftp
编辑/etc/xinetd.d/tftp,文件,将disable的参数值改为no
[root@localhost ~]# cat /etc/xinetd.d/tftp

# default: off

# description: The tftp server serves files using the trivial file transfer \

#?????? protocol.? The tftp protocol is often used to boot diskless \

#?????? workstations, download configuration files to network-aware printers, \

#?????? and to start the installation process for some operating systems.

service tftp

{

??????? socket_type???????????? = dgram

??????? protocol??????????????? = udp

??????? wait??????????????????? = yes

??????? user??????????????????? = root

??????? server????????????????? = /usr/sbin/in.tftpd

??????? server_args???????????? = -s /var/lib/tftpboot

??????? disable???????????????? = no

??????? per_source????????????? = 11

??????? cps??????????????????? ?= 100 2

??????? flags?????????????????? = IPv4

}
/etc/init.d/xinetd start
chkconfig xinetd on
3)pxe引导配置(bootstrrap)
pxe启动映像文件是由syslinux软件包提供的,只要安装了syslinux,就会生产一个pxelinux.0,将这个文件复制到/var/lib/tftpboot即可,如果没有安装,则先安装:
yum install syslinux -y
[root@localhost ~]# find / -name pxelinux.0
/usr/share/syslinux/pxelinux.0
[root@localhost ~]# cp /usr/share/syslinux/pxelinux.0 /var/lib/tftpboot/
[root@localhost ~]# ll /var/lib/tftpboot/
total 28
-rw-r–r–. 1 root root 26759 Jul 16 21:22 pxelinux.0
4)用于网络启动的内核文件
#复制iso 镜像中的/image/pxeboot/initrd.img 和vmlinux 至/var/lib/tftpboot/ 文件夹中
cp /data/sys/images/pxeboot/* /var/lib/tftpboot/
#复制iso 镜像中的/isolinux/*.msg 至/var/lib/tftpboot/ 文件夹中
cp /data/sys/isolinux/*.msg /var/lib/tftpboot/
#在/var/lib/tftpboot/ 中新建一个pxelinux.cfg目录
[root@localhost tftpboot]# pwd
/var/lib/tftpboot
[root@localhost tftpboot]# mkdir pxelinux.cfg
#将iso 镜像中的/isolinux 目录中的isolinux.cfg复制到pxelinux.cfg目录中,同时更改文件名称为default
[root@localhost tftpboot]# cp /data/sys/isolinux/isolinux.cfg /var/lib/tftpboot/pxelinux.cfg/default
未修改前的default文件内容
[root@localhost tftpboot]# cat pxelinux.cfg/default

default vesamenu.c32

#prompt 1

timeout 600


display boot.msg


menu background splash.jpg

menu title Welcome to CentOS 6.6!

menu color border 0 #ffffffff #00000000

menu color sel 7 #ffffffff #ff000000

menu color title 0 #ffffffff #00000000

menu color tabmsg 0 #ffffffff #00000000

menu color unsel 0 #ffffffff #00000000

menu color hotsel 0 #ff000000 #ffffffff

menu color hotkey 7 #ffffffff #ff000000

menu color scrollbar 0 #ffffffff #00000000


label linux

? menu label ^Install or upgrade an existing system

? menu default

? kernel vmlinuz

? append initrd=initrd.img

label vesa

? menu label Install system with ^basic video driver

? kernel vmlinuz

? append initrd=initrd.img xdriver=vesa nomodeset

label rescue

? menu label ^Rescue installed system

? kernel vmlinuz

? append initrd=initrd.img rescue

label local

? menu label Boot from ^local drive

? localboot 0xffff

label memtest86

? menu label ^Memory test

? kernel memtest

? append -
修改default文件
# vi?/var/lib/tftpboot/pxelinux.cfg/default

default ks     #默认启动的是 'label ks' 中标记的启动内核

prompt 1????????? #显示 'boot: ' 提示符。为 '0' 时则不提示,将会直接启动 'default' 参数中指定的内容。

timeout 600      #在用户输入之前的超时时间,单位为 1/10 秒。

display boot.msg? ?#显示某个文件的内容,注意文件的路径。默认是在/var/lib/tftpboot/ 目录下。也可以指定位类似

#'/install/boot.msg'? 这样的,路径+文件名。

F1 boot.msg     #按下 'F1' 这样的键后显示的文件。

F2 options.msg

F3 general.msg

F4 param.msg

F5 rescue.msg

label linux?????? ???#'label' 指定你在 'boot:' 提示符下输入的关键字,比如boot: linux[ENTER],这个会启动'label linux' 下标记的?????????????????? #kernel ??和initrd.img ?文件。

? kernel vmlinuz? ???#kernel 参数指定要启动的内核。

? append initrd=initrd.img ??#append 指定追加给内核的参数,能够在grub 里使用的追加给内核的参数,在这里也都可以使用。

label text

? kernel vmlinuz

? append initrd=initrd.img text

label ks

? kernel vmlinuz

? #append ks=nfs:192.168.1.240:/data/sys/kickstart/ks.cfg initrd=initrd.img??? #告诉系统,从哪里获取ks.cfg文件

?  append ks=http://192.168.1.240:/data/sys/kickstart/ks.cfg initrd=initrd.img

label local

? localboot 1

label memtest86

? kernel memtest

? append -
完整的内容
default text
prompt 0
timeout 600
display boot.msg
F1 boot.msg
F2 options.msg
F3 general.msg
F4 param.msg
F5 rescue.msg
label linux
kernel vmlinuz
append initrd=initrd.img
label text
kernel vmlinuz
append ks=nfs:192.168.1.240:/data/sys/kickstart/ks.cfg initrd=initrd.img text
#append ks=http://192.168.1.240/sys/kickstart/ks.cfg initrd=initrd.img
label ks
kernel vmlinuz
append initrd=initrd.img
label local
localboot 1
label memtest86
kernel memtest
append –
6.安装dhcp服务
yum install dhcp* -y
复制配置模板文件到DHCP的配置目录中
cp -f /usr/share/doc/dhcp-4.1.1/dhcpd.conf.sample? /etc/dhcp/dhcpd.conf
修改/etc/dhcp/dhcpd.conf 配置文件,内容如下:
ddns-update-style none;

ignore client-updates;

subnet 192.168.1.0 netmask 255.255.255.0 {??????????????

??????? ????????option routers 192.168.1.1;?????????

??????????????? option subnet-mask 255.255.255.0;???????

??????????????? default-lease-time 21600;

??????????????? max-lease-time 43200;

??????????????? range dynamic-bootp 192.168.1.200 192.168.1.210;

?????? ?????????filename "pxelinux.0";

??????????????? next-server 192.168.1.240;

}
启动DHCP服务
/etc/init.d/dhcpd start
chkconfig dhcpd on
7.kickstart安装配置
生产ks.cnf的3个方法:
1)每安装好一台linux机器,安装程序都会创建一个ks配置文件
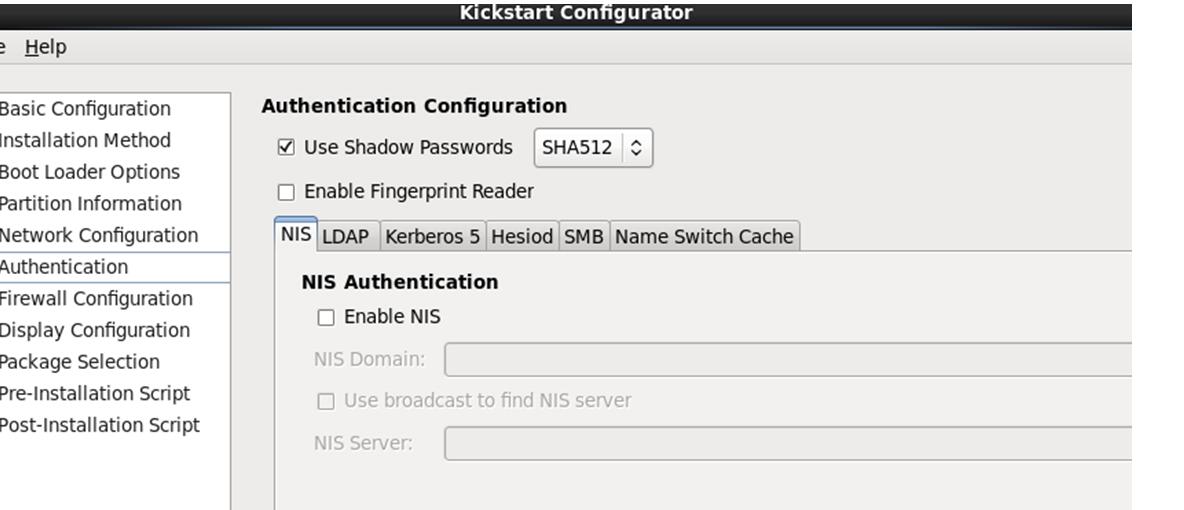
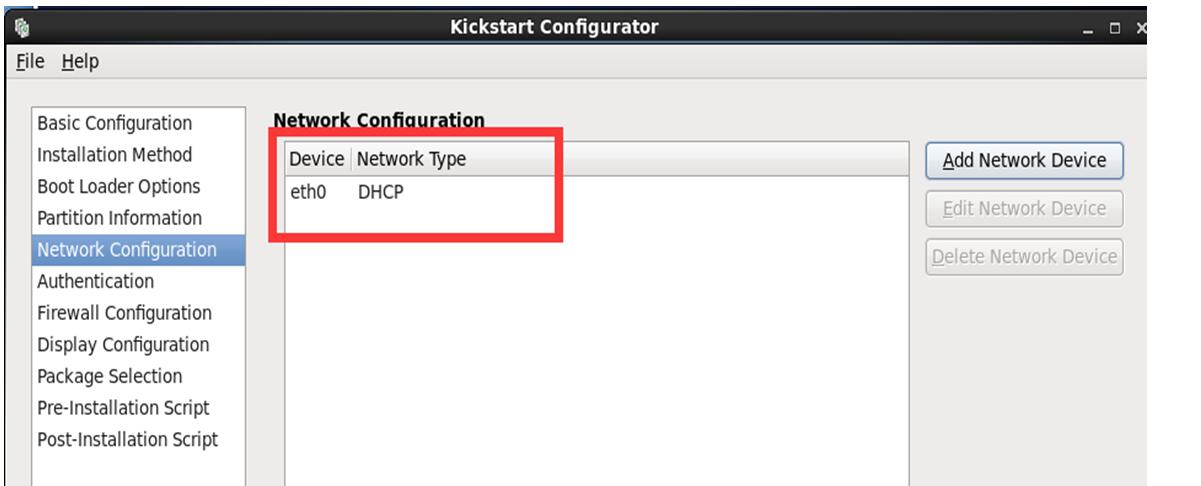
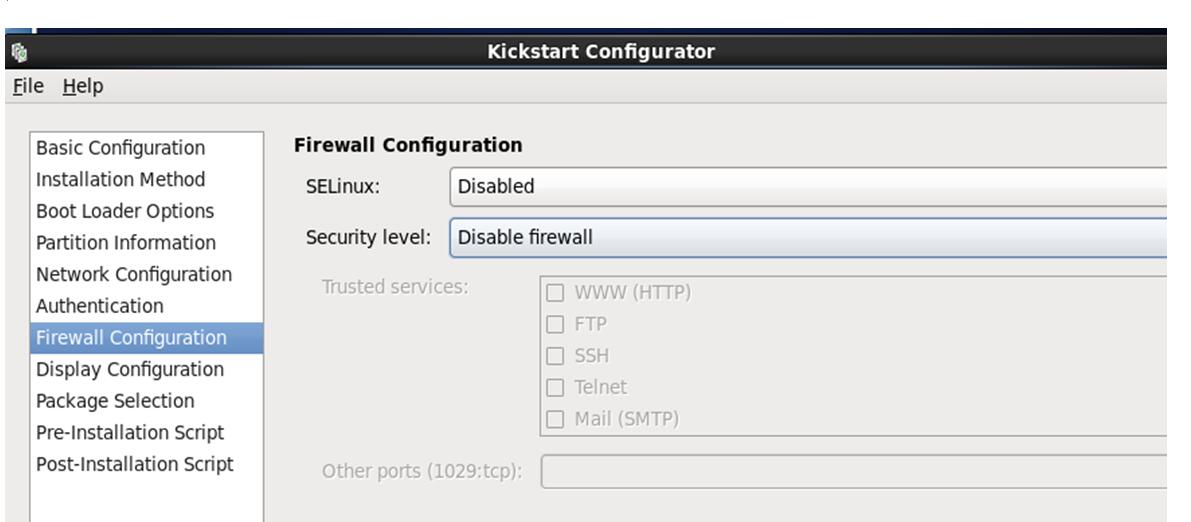
2)利用图形化工具配置ks配置玩家
安装Kickstart
# yum install system-config-kickstart
在桌面环境下配置Kickstart
启动X Windows 环境
# startx
配置Kickstart
# system-config-kickstart
最终完整的配置文件:(生产环境下的)
[root@teddylu kickstart]# cat ks.cfg
#platform=x86, AMD64, or Intel EM64T
#version=DEVEL
# Firewall configuration
firewall –disabled
# Install OS instead of upgrade
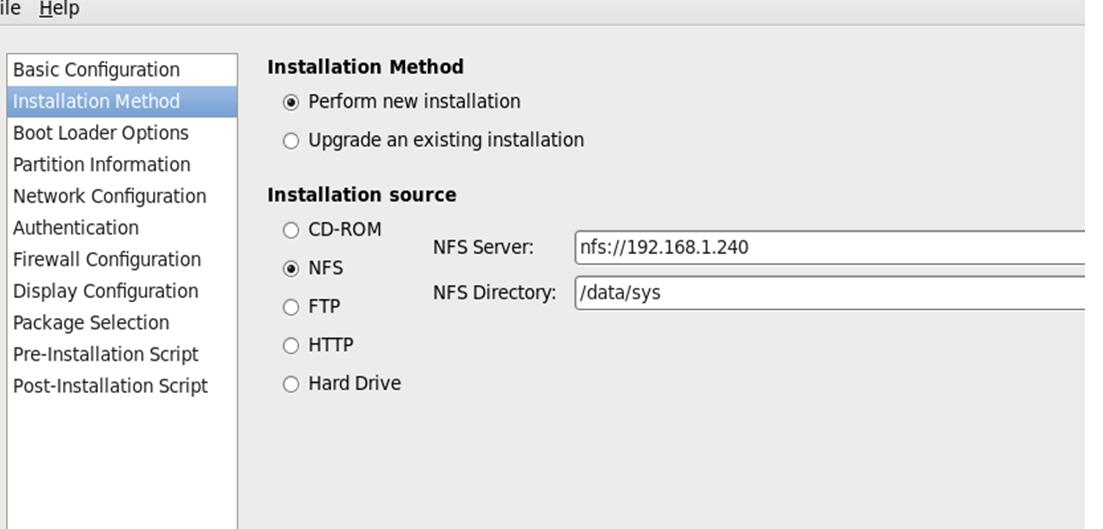
install
# Use NFS installation media
#nfs –server=nfs:192.168.1.240 –dir=/data/sys
url –url=”http://192.168.1.240/sys”
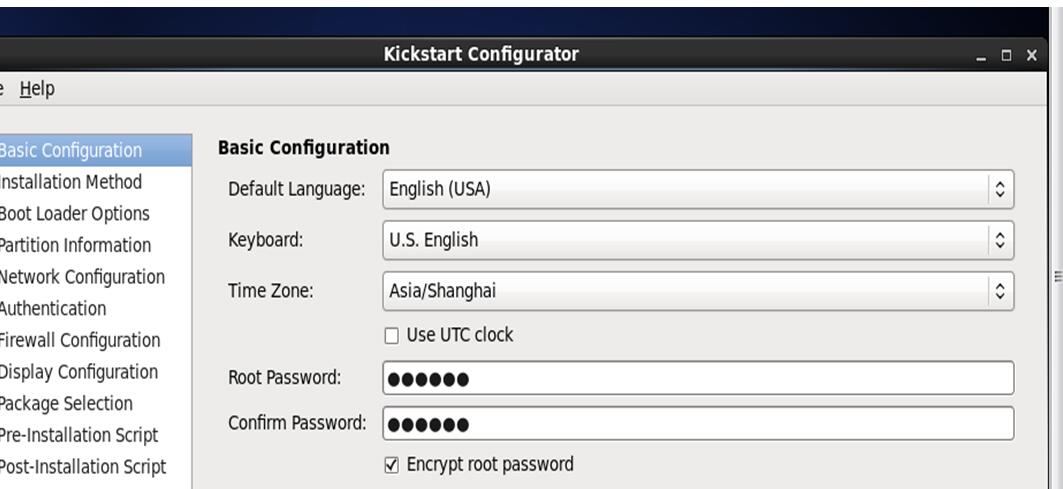
# Root password
rootpw –iscrypted $1$PC8E2Big$K37k5G5wI/0G.VBpx6IqP0
# System authorization information
auth? –useshadow? –passalgo=sha512
# Use graphical install
graphical
firstboot –disable
# System keyboard
keyboard us
# System language
lang en_US
# SELinux configuration
selinux –disabled
# Do not configure the X Window System
skipx
# Installation logging level
logging –level=info
# Reboot after installation
reboot
# System timezone
timezone? Asia/Shanghai
# Network information
network? –bootproto=dhcp –device=eth0 –onboot=on
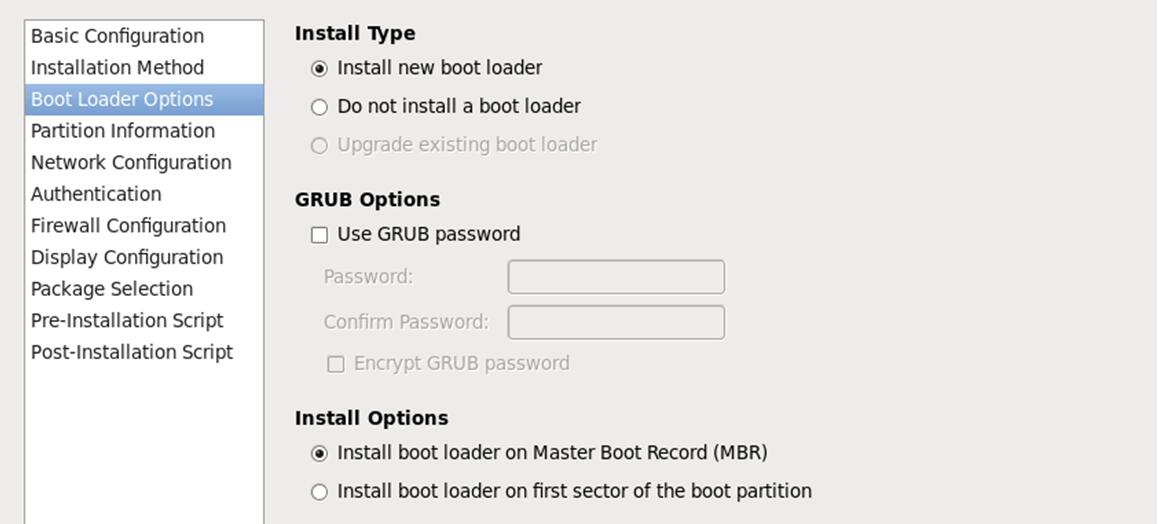
# System bootloader configuration
bootloader –location=mbr
# Clear the Master Boot Record
zerombr
# Partition clearing information
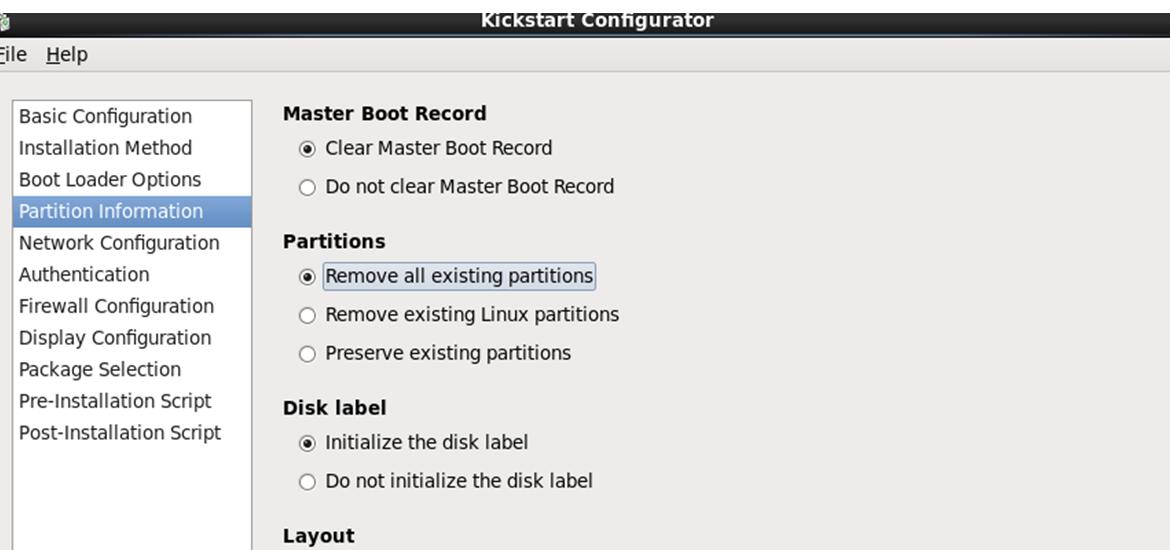
clearpart –all –initlabel
# Disk partitioning information
part /boot –fstype=”ext4″ –size=200
part swap –fstype=”swap” –size=1024
part / –fstype=”ext4″ –size=8192
%packages
@additional-devel
@base
@development
%post
#base init configure
echo “nameserver 114.114.114.114” >>/etc/resolv.conf
echo “nameserver 8.8.8.8” >>/etc/resolv.conf
#add teddylu user
useradd teddylu
echo “123456”|passwd –stdin teddylu
#allow teddylu sudo
echo “teddylu ALL=(ALL)????? NOPASSWD:ALL”>>/etc/sudoers
#setup service
for?sun?in?`chkconfig –list|grep?3:on|awk?'{print $1}’`;do?chkconfig –level?3?$sun off;done
for?sun?in?crond rsyslog sshd network;do?chkconfig –level?3?$sun on;done
#setup open file number
echo?’*? -? nofile? 65535′?>> /etc/security/limits.conf
#setup ssh
#change ssh default port to 55555
cp /etc/ssh/sshd_config /etc/ssh/sshd_config.save
sed -i ‘s%#Port 22%Port 55555%’ /etc/ssh/sshd_config
#ban root to login
sed -i ‘s%#PermitRootLogin yes%#PermitRootLogin no%’ /etc/ssh/sshd_config
#enable ‘PermitEmptyPasswords no’
sed -i ‘s%#PermitEmptyPasswords no%PermitEmptyPasswords no%’ /etc/ssh/sshd_config
#ban to use dns
sed -i ‘s%#UseDNS yes%UseDNS no%’ /etc/ssh/sshd_config
/etc/init.d/sshd reload
%end
3)手工创建ks配置文件
略
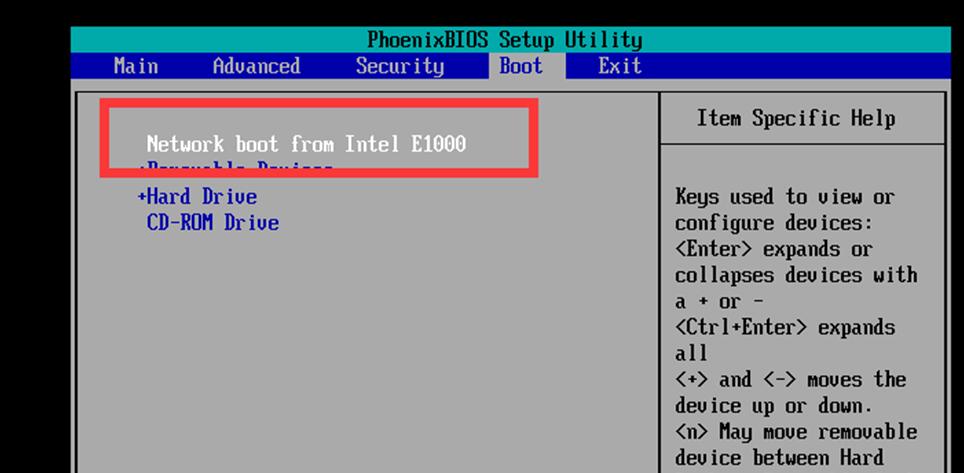
配置客户端pxe引导安装
新配置一台虚拟机,过程略
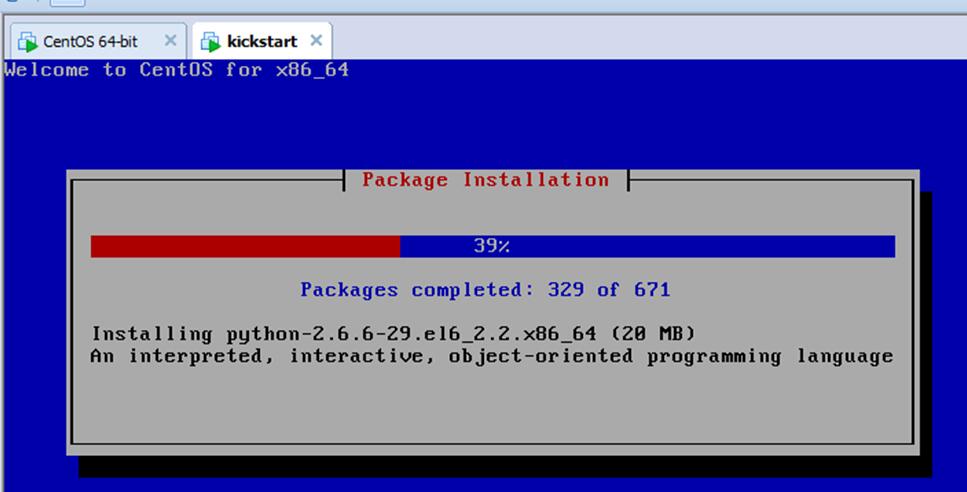
启动虚拟机,选择从网卡启动,以下是按照的过程:

提示:
1)如果出现下面的提示错误
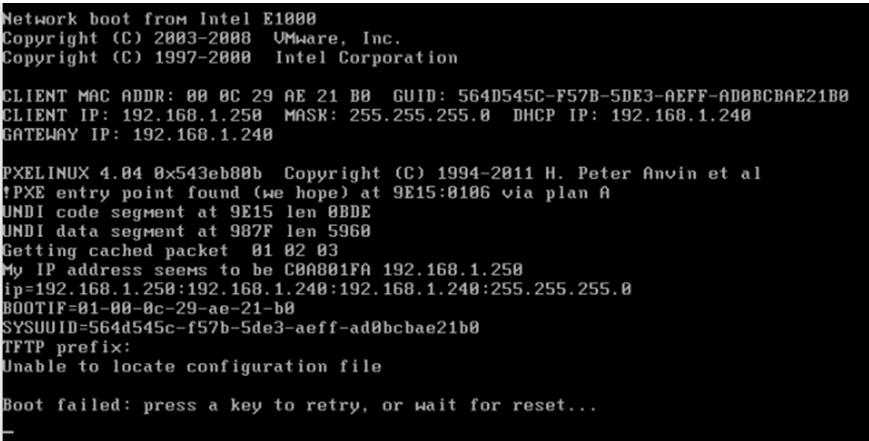
可能的原因是default文件的权限不对
解决办法:
[root@teddylu pxelinux.cfg]# ll
total 12
-rwxr-xr-x. 1 root root 406 Jul 17 11:02 default
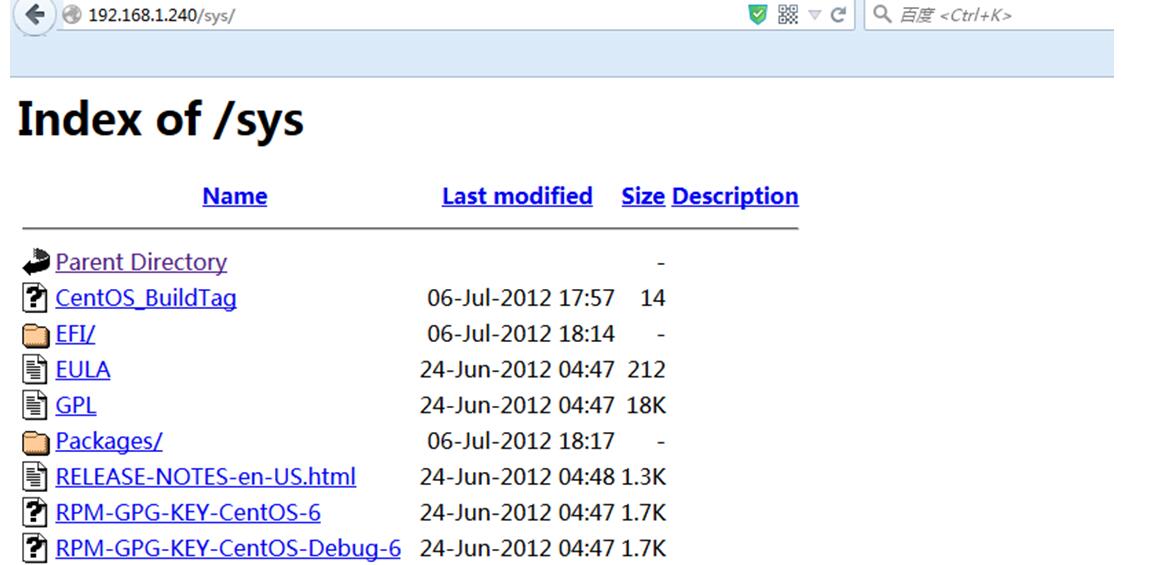
如果是用http ,确保系统文件和ks文件都可以通过http访问,如下图所示: