
| role | ip | 说明 |
|---|---|---|
| CA | 192.168.1.202 | 证书授权中心 |
| Web | 192.168.1.201 | 实现https |
环境: [root@CA ~]# cat /etc/redhat-release CentOS release 6.3 (Final) [root@CA ~]# uname -m x86_64 [root@CA ~]# rpm -qa openssl openssl-1.0.1e-30.el6_6.5.x86_64 在CA端操作 1)修改配置Openssl配置文件 vi /etc/pki/tls/openssl.cnf dir = /etc/pki/CA # Where everything is kept CA目录路径 certs = $dir/certs # Where the issued certs are kept 发布出去的证书目录 crl_dir = $dir/crl # Where the issued crl are kept 吊销证书的目录,一定要有这个目录,若没有就要创建 database = $dir/index.txt # database index file. 数据库,一定要有这个文件,若没有就要创建 #unique_subject = no # Set to 'no' to allow creation of # several ctificates with same subject. new_certs_dir = $dir/newcerts # default place for new certs. 新证书的目录 一定要有这个目录,若没有就要创建 certificate = $dir/cacert.pem # The CA certificate CA的根证书路径 serial = $dir/serial # The current serial number 证书的序列号,一定要有这个文件,若没有就要创建 crlnumber = $dir/crlnumber # the current crl number # must be commented out to leave a V1 CRL crl = $dir/crl.pem # The current CRL private_key = $dir/private/cakey.pem # The private key CA私钥路径 RANDFILE = $dir/private/.rand # private random number file 下面是可修改的选项 #证书的有效期 default_days = 365 还有就是证书的信息,一般是按照自己的实际情况填写,在此就省略了! 提示:这里有关证书的信息,比如国家,省,城市,等,CA的证书必须和csr文件中的这些信息保持一致否则,在后面的签名的时候会报错: The stateOrProvinceName field does not exist in the CA certificate, 原因:是因为默认的策略是要匹配国家名,省名,组织名 policy = policy_match # For the CA policy [ policy_match ] countryName = match stateOrProvinceName = match organizationName = match organizationalUnitName = optional commonName = supplied emailAddress = optional 2)准备及生成CA的根证书的私钥 [root@CA CA]# pwd /etc/pki/CA mkdir private crl certs newcerts #新建证书存放目录,如果有了,就不用创建,我的这个版本的已经有了 echo '00' > serial #新建serial文件并写入初始序列号00 touch index.txt #新建index.txt空文件 [root@CA CA]# ls certs crl index.txt newcerts private serial [root@CA CA]# (umask 077;openssl genrsa -out private/cakey.pem 2048) Generating RSA private key, 2048 bit long modulus ............................................+++ ................................................+++ e is 65537 (0x10001) [root@CA CA]# ll private/cakey.pem -rw-------. 1 root root 1675 Jan 19 13:57 private/cakey.pem 3)生成CA的根证书(默认是30days,除非用-days 指定特定的时间) [root@CA CA]# openssl req -new -x509 -key private/cakey.pem -out cacert.pem 然后一步一步,按照提示操作 4)生成https服务的密钥和证书请求 (umask 077;openssl genrsa -out www.key) openssl req -new -key www.key -out www.csr 这个地方很重要,一定要填自己网站的域名5)给证书请求提供签名(默认是30day,除非加上参数-days 指定特定的证书有效期) openssl ca -in www.csr -out www.crt 出现下图表示签名成功
#查看证书信息 [root@CA ssl]# cat /etc/pki/CA/index.txt V 160119205755Z 00 unknown /C=CN/ST=Fujian/O=abc LTD/CN=blog.com/[email protected] 在web上操作 环境:(确保apache上已经有ssl_module模块的支持) [root@NFS-Client-01 ~]# cat /etc/redhat-release CentOS release 6.3 (Final) [root@NFS-Client-01 ~]# uname -m x86_64 [root@NFS-Client-01 ~]# /application/apache/bin/apachectl -v Server version: Apache/2.2.29 (Unix) Server built: Nov 28 2014 04:49:53 [root@NFS-Client-01 ~]# grep "mod_ssl.so" /application/apache/conf/httpd.conf LoadModule ssl_module modules/mod_ssl.so 1)将在CA上的2个文件(web的证书和私钥)和CA根证书传到web机器上 略!! 2)配置Apache主配置文件httpd.conf及httpd-ssl.conf #默认情况下这一行是被注释掉了 [root@NFS-Client-01 ssl]# grep "httpd-ssl.conf" /application/apache/conf/httpd.conf #Include conf/extra/httpd-ssl.conf #去掉注释 [root@NFS-Client-01 ssl]# sed -i 's%#Include conf/extra/httpd-ssl.conf%Include conf/extra/httpd-ssl.conf%' /application/apache/conf/httpd.conf #再次检查 [root@NFS-Client-01 ssl]# grep "httpd-ssl.conf" /application/apache/conf/httpd.conf Include conf/extra/httpd-ssl.conf #配置网站的权限 #test ssl over http <Directory "/home/blog"> Options FollowSymLinks AllowOverride None Order allow,deny Allow from all #编辑httpd-ssl.conf # General setup for the virtual host DocumentRoot "/home/blog" ServerName blog.com ServerAdmin [email protected] ErrorLog "/application/apache2.2.29/logs/ssl_error_log" TransferLog "/application/apache2.2.29/logs/ssl_access_log" SSLEngine on SSLProtocol all -SSLv2 下面是默认的服务器的证书和私钥的路径地址 SSLCertificateFile "/application/apache2.2.29/conf/server.crt" SSLCertificateKeyFile "/application/apache2.2.29/conf/server.key" 下面是CA的证书目录路径和文件路径 SSLCACertificatePath "/application/apache2.2.29/conf/ssl.crt" SSLCACertificateFile "/application/apache2.2.29/conf/ssl.crt/cacert.pem" #复制服务器的证书和私钥,及Ca的根证书到上面的对应的路径下,并检查语法 过程略!!! 打开网站,看看配置是否成功了!!!
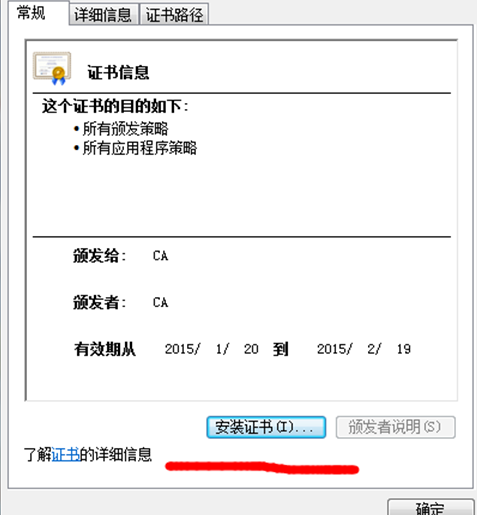
成功了 !!! 提示:将CA的根证书cacert.pem下载到访问web的用户电脑上,并改名为cacert.crt
然后安装证书,就ok了,以后打开这个网站就不会再有浏览器提示这是有风险的网站了!
linux下基于openssl的https服务配置